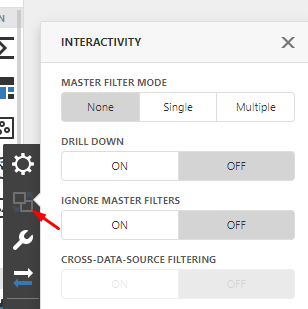
- The Interactivity tool section provides additional tools.
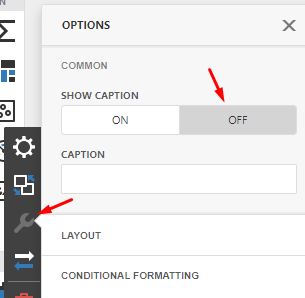
- The Options wrench allows you to name your grid by entering the name in the Caption field or as in this case chose to turn off the Show Caption.
Seems Saving should also be part of the initial create, intro in section 1 so it stands by itself?
- Save your dashboard and click Viewer to see the final dashboard.
Is this a whole new section on creating a dashboard with a chart? If not, shouldn't it be part of the first section?-- This is showing how to do a bar chart.
Creating a Bar Chart
Give your dashboard a Name. Select the module you wish to connect to and then click the Create Button.
Select how you want to display your data. In this case a Bar Chart.
Click on the "Click Here" to bind to the data you want to use for your chart.
Click on Configure Values to show the list of fields you can choose to bind to. Then select the field you wish to use – In this case Root Cause.
For Arguments also choose RootCause
For Hidden Dimensions choose Cancelled
Choose these setting with the Interactiviy gear
Use these settings for the Option Gear Common section. You wil need to give the graph a name in the Caption box
This is where you will decide if you want to Rotate the graph
Here are the settings available in the Axis X section
Here are the settings available in the Axis Y section
Seems if the point here is to show how to create a graph, the end result should be shown.


